Example Workflow
This is an example workflow to help you get started with RollNest. It's not exhaustive, but it will give you a good idea of how to use the app and quickly get a usable layout. Parts of the interface that aren't used in the example workflow are explained in the "Other tools" section below.
1. Set Paper Size and DPI
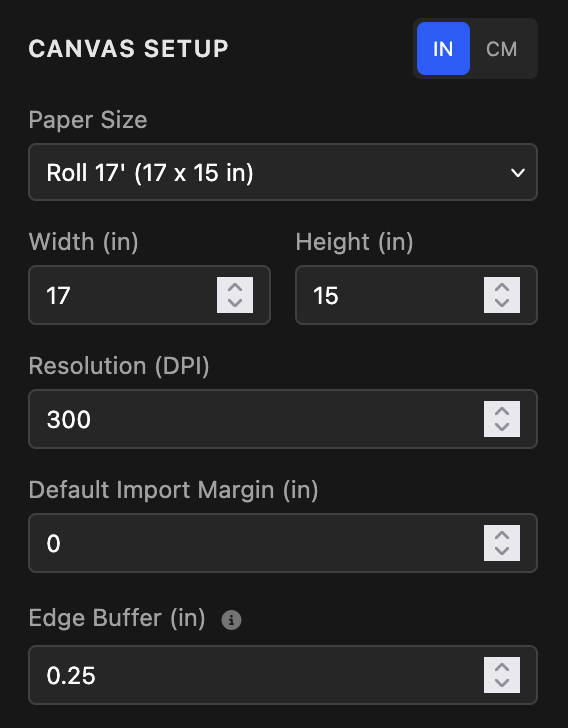
This is where you can set the paper size and DPI. There are a few presets for common paper sizes. If you don't know what to put for DPI, leave it at 300. You can also change the units and add a default margin for all imported images. The edge buffer setting is used later on to ensure the layout of the images stays within the printable area of the paper (represented by the grey lines around the canvas).
2. Load Images
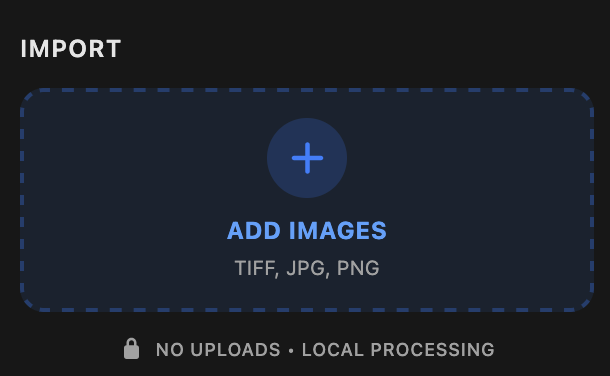 Click the "Add images" button on the right side of the screen to open a file dialog and select your images. You can select multiple images at once.
You can also drag and drop images directly onto the canvas to load them. If images are outside the canvas or overlapping, they will be highlighted in red, indicating they won't be fully printable.
Click the "Add images" button on the right side of the screen to open a file dialog and select your images. You can select multiple images at once.
You can also drag and drop images directly onto the canvas to load them. If images are outside the canvas or overlapping, they will be highlighted in red, indicating they won't be fully printable.
3. Set Margins, and resize your images
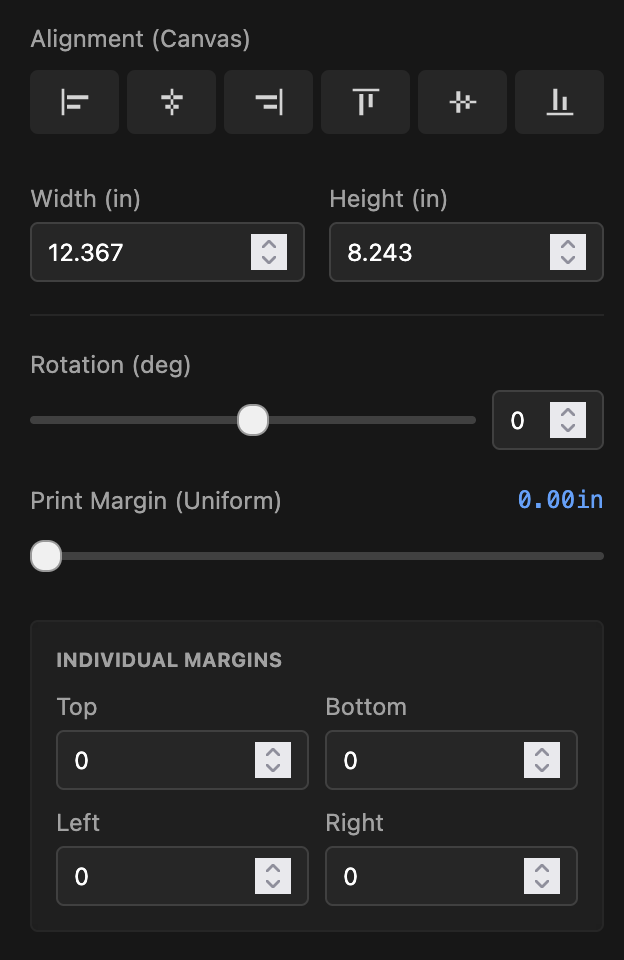
Click on one of your imported images to open its specific settings on the right side of the screen, where you can set the margins. If you select multiple images (Ctrl + Click), the margins will be applied to all of them. You can also select all images at once using Ctrl + A.
4. Automatically Arrange Images
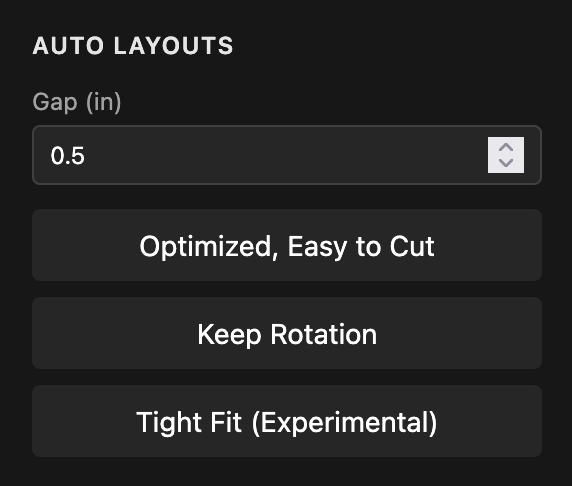
This is where the magic happens! In the middle of the left panel is the Auto Layout section. If needed, you can set the spacing between images by changing the gap, and then apply an auto layout:
- Optimized: Arranges images in rows to make them easy to cut.
- Keep Rotation: Same as above, but preserves the original rotation of your images.
- Tight fit (experimental): Tries to pack the images as tightly as possible, though this may make the layout harder to cut.
5. Export TIFF
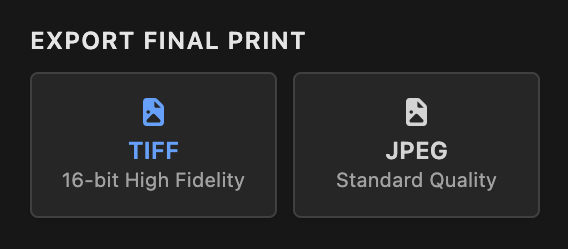
At the bottom of the left panel, you will see a button to export the layout as a TIFF file. Click on it to export, wait a moment, and you're done!
Other tools
Most of the time, the auto-layout does a great job. However, if you need a more hands-on approach, several tools are available to help:
Alignments
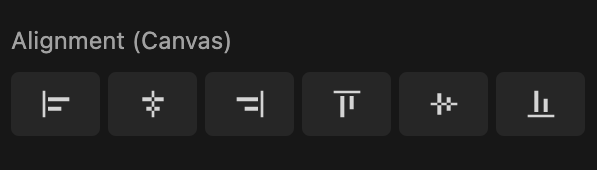
These buttons work in two ways:
- If you select a single image, the alignment happens relative to the canvas.
- If you select multiple images, the alignment happens relative to the first image you selected.
There is also the possibility to resize your images if needed.
Snapping
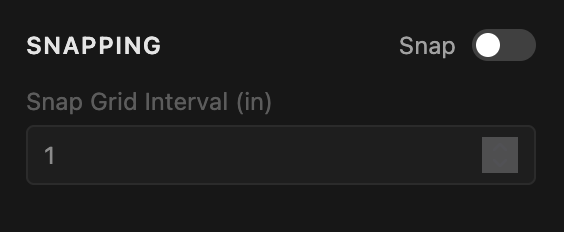
Another option is to manually align the images by turning on snapping. There is also a setting to change the snapping interval.
Shortcuts
This list can be accessed from the bottom left corner of the app.
- Undo Action:
Ctrl + Z - Redo Action:
Ctrl + Y - Select All:
Ctrl + A - Add to Selection:
Shift + Click - Duplicate Layer:
Ctrl + D - Delete Selected:
Delete - Clear Selection:
Esc - Zoom Canvas:
Ctrl + Scroll - Pan Canvas:
Drag Canvas / Scroll - Nudge Layer:
Arrow Keys - Fast Nudge:
Shift + Arrows - Increase Margin:
m - Decrease Margin:
Shift + m - Toggle Selection:
Enter / Space - Navigate Layers:
Tab
FAQ
Is RollNest free? Yes, RollNest is a completely free online utility to help with arranging images for printing.
Does RollNest keep my photos somewhere? No. RollNest runs entirely in your web browser. Your images never leave your computer, and they are not uploaded anywhere.
Does it support 16-bit TIFF files? Yes. RollNest preserves 16-bit depth throughout the workflow to ensure smooth gradients for high-end printing.
Color Management This app acts as a pass-through compositor and does not perform color space conversions (e.g. sRGB to AdobeRGB). For the best results in Photoshop/Printing, ensure all your source images share the same color profile before importing them here.